You are viewing the RapidMiner Hub documentation for version 10.2 - Check here for latest version
Configure Projects
This document mostly addresses the question of project cleanup.
Project cleanup is useful when a project is rapidly growing in size and threatens to use up all available disk space in your home directory.
Table of contents
Caching Projects in Job Containers
Job Containers cache Projects and update them before every execution, to reduce download times. To control cache sizes in Job Containers, see the configuration options described under Container caching for Projects.
Git server configuration
By default, Project data resides within the RapidMiner Server home directory, under
<rapidminer-server-home>/data/repositories/git_server/<projectname>
You can configure Project behavior by modifying the Git configuration files inside this directory.
Force-push and deletions
In new Projects, force pushes and deletions are disabled. This behavior can be changed for any Project at any time by manually editing the file
<rapidminer-server-home>/data/repositories/git_server/<projectname>/config
and changing the attribute values in the [receive] section from true to false.
[receive]
    denyNonFastForwards = false
    denyDeletes = false
Sample Projects
If you like to disable automatic sample Project creation on startup, add the property REPOSITORIES_SAMPLE_ENABLED with value false to deployment the .env file.
Hidden files
By default, files with a leading dot, such as .gitattributes, are automatically hidden in the Project content browser. You can view these hidden files using the toggle button in the Project content browser.
Upload limit
In the contents browser and the Project creation dialog and in the Project content browser, you can upload a .zip file,
so the Project will be populated with its contents. The maximum file size of such a .zip file is 5 GB.
To increase the file size limit, add the environment variable
REPOSITORIES_MAX_UPLOAD_SIZE
with a specific value, for example 10240Mb to set it to 10 GB.
Cleanup
While creating a new Project, or changing the settings of an existing Project, you can add an automatic cleanup to the Project. This mechanism will clean up the Snapshot history of your Project. This reduces the size of your Project if it occupies a lot of disk space inside your home directory. The cleanup can be configured in two ways:
- Just clean and drop
- Clean and retain an archived version of your Project
The first case will just delete the previous Snapshot history of the Project while keeping the current state of the contents. Keep in mind, that this means, that you are no longer able to restore the contents from a previous snapshot. The second way will create an archive of the Project, keeping the snapshot history in that archive. This archive can be created for every cleanup iteration, keeping the history from the last cleanup until the new archive creation date. The disk space will not be reduced by this method, but rather will increase, as the archive of the Project and the Project itself are still stored. You also have the option to delete archives to reduce the space used by them. It is also possible to automatically limit the number of archives kept, which will delete the oldest archives first, or delete all archives which are older than a user defined date.
Disk space requirements
During the cleanup, Projects need to be checked out and backups need to be created. This leads to the cleanup needing at least three times the size of the Project.
When the Project should be archived as well, then the diskspace requirements will grow with each archive iteration by the size of the Project on archive time.
Cleanup settings
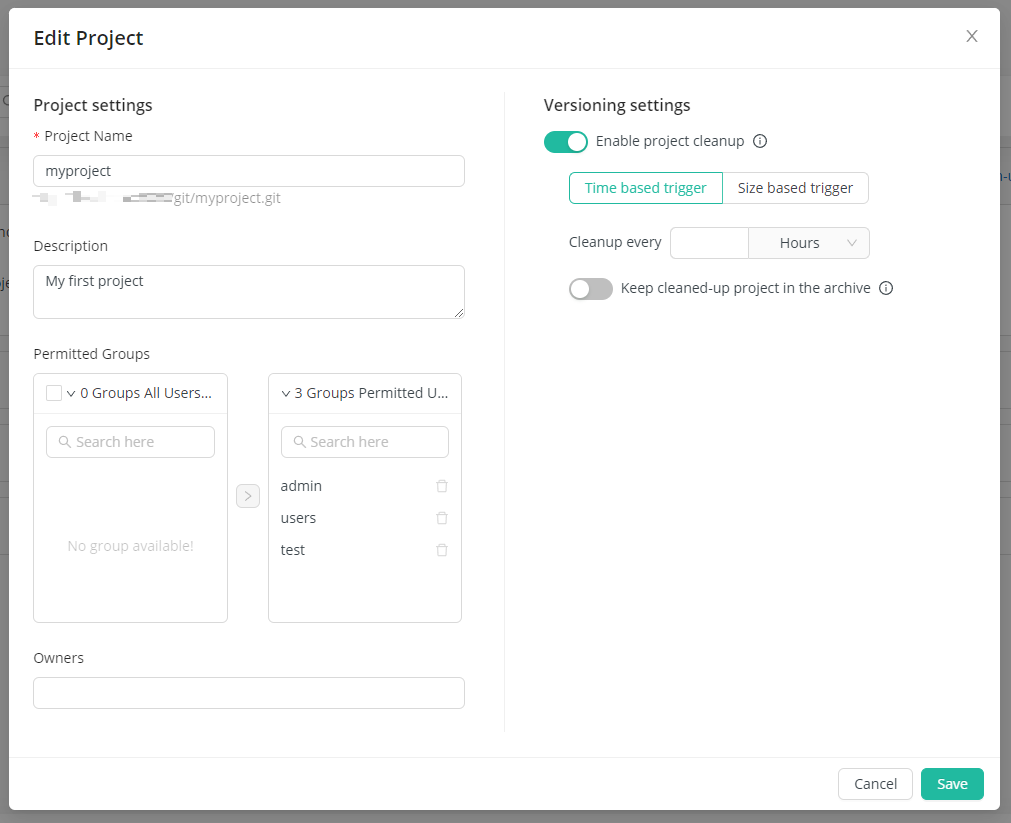
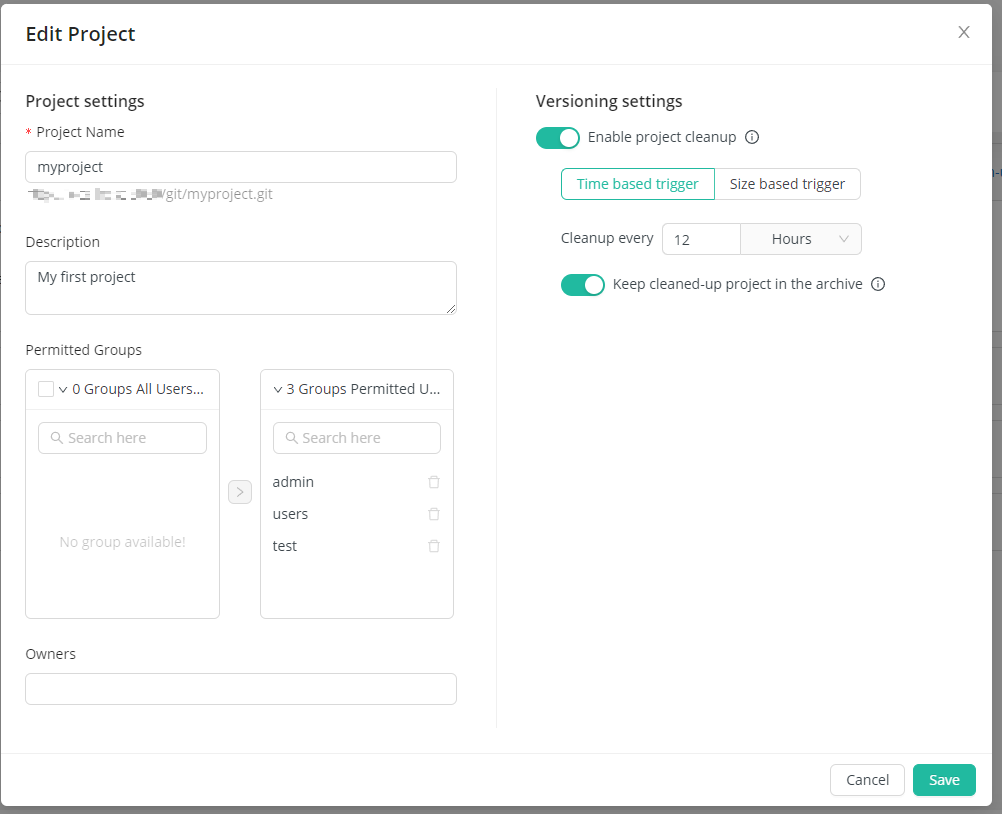
To configure the cleanup, you need to click the Enable Project cleanup switch inside the Creation or Edit dialogs.

After that, you can specify triggers of automatic cleanup. The triggers can be:
- Time based
- Size based
In the time based setting, the cleanup can be configured in hours or days. In the size based setting the size can be set in MB and GB. When choosing the size based setting, the scheduled cleanup will stop when the size after the cleanup is still bigger or the same as the configured size. Keep in mind to set a reasonable value for both settings.
Like previously mentioned, it is possible to keep archives of cleaned up Projects. The archive of a cleaned up Project can be opened in RapidMiner Studio, but
changes are not permitted, as it is read-only. The archive function can be turned on when activating the Keep cleaned-up Project in archive switch inside the Creation or Edit dialogs.
An example configuration for the cleanup could look like this:

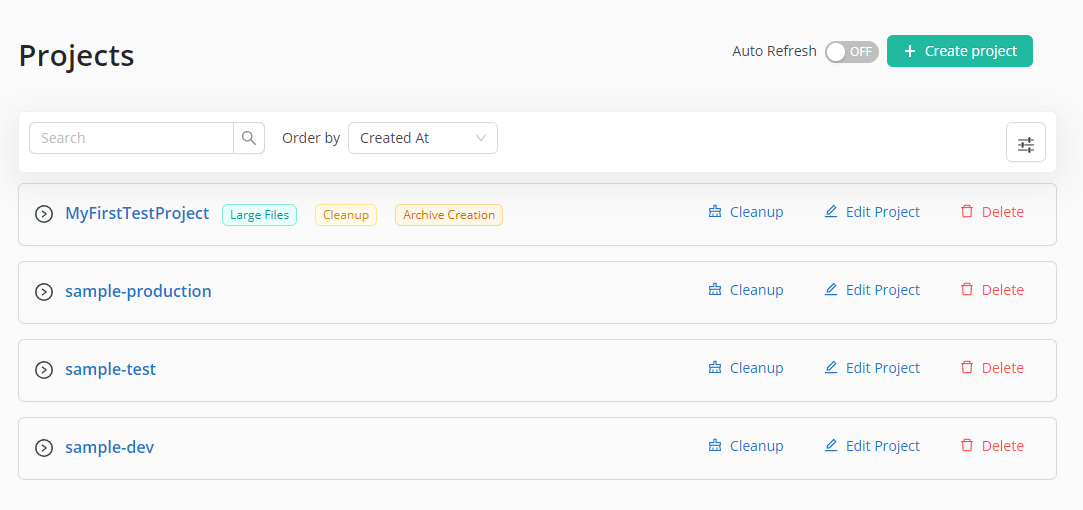
After setting the cleanup settings, the Project overview will show the current configuration:

If the Project was configured to keep the archives of the cleanup, the archives can be seen on a new tab in the Project overview:

AI Hub server settings
Inside the AI Hub Server deployment configuration, the environment variable REPOSITORIES_SCHEDULED_CLEAN_UP_INTERVAL sets the interval of the trigger check. When no TIME_UNIT is added to the
time, ms (milliseconds) will be used. The environment variable REPOSITORIES_RESTORE_REPOSITORIES_ON_STARTUP will be described in detail in the error handling chapter.
Manual cleanup
Instead of automated Project cleanups, you can manually trigger the cleanup from the Project overview. In this case, an archive will be created, if Keep cleaned-up Project in archive has been enabled.

Restrictions during ongoing cleanup
To maintain consistency, execution of processes within the Project is not allowed during cleanup. Hence, before the cleanup is started, Job Agents attempting to execute a new process are blocked, and running processes are allowed to finish. During the cleanup, changes to the Project contents and settings, deletion, deployment creation, and download are not possible.
Cleanup error handling
During the cleanup the type of error happening can vary depending on the stage of the cleanup. The different types of errors are outlined here, together with different ways of handling them. Some errors need to be handled by the administrator of the platform, as changes to the underlying file system could be necessary. By default, the Project will be restored to the state before the cleanup was triggered, so no data is lost.
Size Error (Handled by Project Owner)
As mentioned previously, when the Project is still bigger than the trigger size after the cleanup, the cleanup trigger will be stopped. A warning will be in the web interface. When you encounter this error, then please review the size used as trigger.
The warning is displayed as a warning sign on the Project overview and on the Project details page:

Block error (handled by administrator)
The block error occurs when Job Agents are not able to successfully block execution for a Project. This could happen if the Job Agent is not responding to the block request. The solution to this problem is checking the connection between AI Hub Server and all the Job Agents to ensure all internally sent messages are delivered successfully. In order to verify, check AI Hub Server and Job Agent logs. It should also be checked if Job Agents are stuck in the blocked state for a specific Project. The Job Agents will log the line
The location <PROJECT_NAME> is blocked for executing
if the Project is blocked from execution. The steps to unblock the agent by hand could include
- Check connection between AI Hub Server and the Job Agents
- Restart AI Hub Server
- Restart the Job Agents
Depending on what failed during Project blocking, the following steps are potential solutions to this problem: If the AI Hub Server did not receive the acknowledgment for all agents and the Agents are still blocked, a restart of AI Hub would fix the problem. When AI Hub Server is restarted, all Job Agents are unblocked. In the case when not all Agents did receive the unblock-message after the cleanup, the blocked Job Agents can be restarted. Just like the AI Hub Server, the Job Agent will no longer be blocked on restart.
This error is displayed as a warning sign with a message in the Project overview and in the Project details page:

Archive error (handled by Project owner or administrator)
The archive warning can happen when the archive could not be created for a Project. In this case, the settings should be reviewed. The Platform administrator should check the available disk space as well, to make sure the archive has enough disk space left.
As the other previously mentioned errors, this warning is displayed on the Project overview and in the Project details page:

Rollback Hard Error (Handled by administrator)
When one of the previous mentioned warning cases arises, the Project is usually rolled back to the state before the cleanup has been started. It is possible that this rollback could fail. In that case, the Project can no longer be used. A hard error is shown on Project overview

and Project detail page.

The first solution to this problem is to check all read and write permissions for the
REPOSITORIES_BASE_DIR inside the
AI Hub Server home directory and restart AI Hub with the
REPOSITORIES_RESTORE_REPOSITORIES_ON_STARTUP environment variable set to true.
This flag will turn on a rollback on all failed projects.
When this fallback mechanism fails, the Project is in a broken state.
To further investigate, access to the underlying filesystem of the
AI Hub Server home directory
(where Project data is stored by default) is needed.
In particular, this folder includes the following directories:
git_server,git_lfs_serverandgit_server_temp.
You can also find backup folders inside the REPOSITORIES_BASE_DIR named
git_server_backupandgit_lfs_server_backup.
Inside the git_server folder, there is a subfolder for every Project,
unless Project large files (LFS) is enabled, in which case you will find
the Project inside git_lfs_server.
Depending on the type of rollback error, shown in the Project overview,
you can attempt the following actions:
If the rollback could not restore the Main Project data (Git) or Project large files (LFS) directory backup created during cleanup:
- Inside the
REPOSITORIES_BASE_DIR/git_server_backup/orREPOSITORIES_BASE_DIR/git_lfs_server_backup/(following named{git or lfs}) path look for a folder named{project_name}- If this folder exists, you can proceed to the next step
- If it does not exist, the Project cannot be recovered.
- If the main Project folder
{project_name}still exists, remove this folder- In this error case, this folder should no longer exist
- Move the
{git or lfs}_backup/{project_name}folder to{git or lfs}/{project_name} - Restart AI Hub with the REPOSITORIES_RESTORE_REPOSITORIES_ON_STARTUP environment variable set to
false
If the rollback could not clean the Main Project data (Git) or Project large files (LFS) created during cleanup:
- Inside the
REPOSITORIES_BASE_DIR/git_server_backup/orREPOSITORIES_BASE_DIR/git_lfs_server_backup/(following named{git or lfs}) path look for a folder named{project_name}- If this folder exists, you can proceed to the next step
- If it does not exist, the Project cannot be recovered.
- If the main Project folder
{project_name}still exists, remove this folder- In this error case, this folder should exist
- Move the
{git or lfs}_backup/{project_name}folder to{git or lfs}/{project_name} - Restart AI Hub with the REPOSITORIES_RESTORE_REPOSITORIES_ON_STARTUP environment variable set to
false
If the GIT or LFS directory backup directory could not be cleaned:
- Inside the
REPOSITORIES_BASE_DIR/git_server_backup/orREPOSITORIES_BASE_DIR/git_lfs_server_backup/path look for a folder named{project_name} - Delete
{project_name} - Restart AI Hub with the REPOSITORIES_RESTORE_REPOSITORIES_ON_STARTUP environment variable set to
false
General error (handled by Project owner or administrator)
The general warning can happen when the cleanup did not succeed. As this can have many reasons, the logs of AI hub should be checked. As the rollback did finish successfully in this case, the Project can still be used.
